


by Benjamin Lallement, DevOps and member of the collective Gologic.
Goals Series
This article series aims to explore the different tools for doing pipeline-as-code and deployment.
The goal for each article remains the same: Checkout GIT source code, compile a JAVA project with Maven, run the tests then deploy the application on AWS BeanStalk.
Those steps will be written as code in a Pipeline and executed with a CI/CD tools.
Each article is divided into several parts:
- Installation and startup of a CI/CD tool
- Configuration CI/CD tool (if needed)
- Code continuous deployment pipeline
- Check deployment
- A simple Conclusion
If you want to run pipeline, you will need:
- Docker runtime to execute pipeline steps
- an AWS BeanStalk environment with access key and secret to deploy application
Before starting, let’s define two key concepts: Continuous Deployment and Pipeline-As-Code.
What does “Continuous Deployment” mean?
Continuous Deployment is closely related to Continuous Integration and refers to the release into production of software that passes the automated tests.
“Essentially, it is the practice of releasing every good build to users”, explains Jez Humble, author of Continuous Delivery.
By adopting both Continuous Integration and Continuous Deployment, you not only reduce risks and catch bugs quickly, but also move rapidly to working software.
With low-risk releases, you can quickly adapt to business requirements and user needs. This allows for greater collaboration between ops and delivery, fueling real change in your organization, and turning your release process into a business advantage.
What does “Pipeline as Code” mean?
Teams are pushing for automation across their environments(testing), including their development infrastructure.
Pipelines as code is defining the deployment pipeline through code instead of configuring a running CI/CD tool.
Source code
GitHub Demo Reference is there: Continuous Deployment Demo
Jenkins
Goal
For this first article, Jenkins will be the guinea pig.
Jenkins is an open source automation server written in Java. Jenkins helps to automate the non-human part of software development process, with continuous integration and facilitating technical aspects of continuous delivery. It is a server-based system that runs in servlet containers such as Apache Tomcat.
Jobs can be triggered by various means, for example by commit in a version control system, by scheduling via a cron-like mechanism and by requesting a specific build URL. It can also be triggered after the other builds in the queue have completed. Jenkins functionality can be extended with plugins.
Install and Run Jenkins with Docker
Run Jenkins docker container
Execute following docker command to run Jenkins:
docker run -p 8080:8080 -p 50000:50000 jenkins/jenkins:lts
More details on wiki.jenkins.io
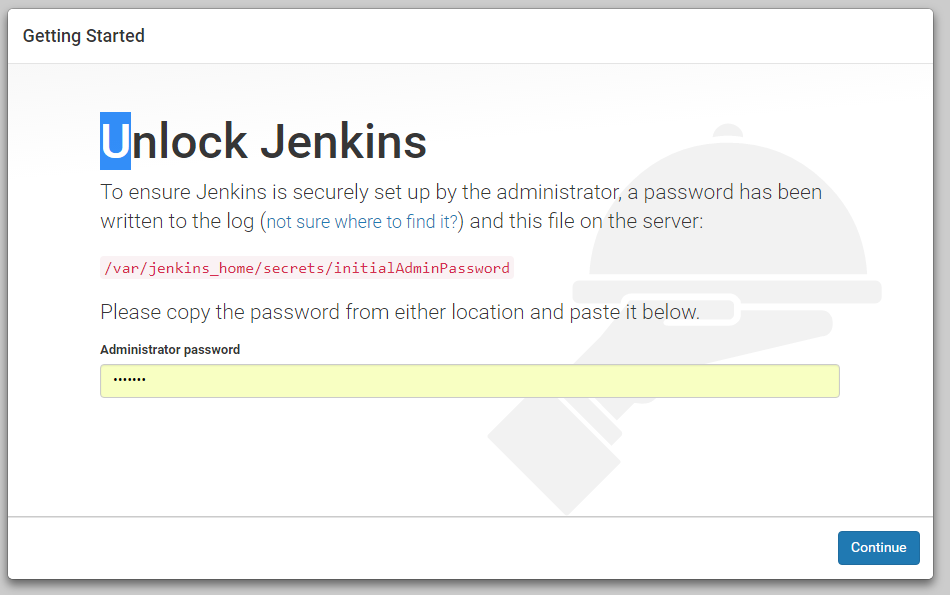
Then connect to Jenkins at http://localhost:8080 using password generated in Jenkins starting logs.
ex:
Jenkins initial setup is required. An admin user has been created and a password generated.
Please use the following password to proceed to installation:
f421195b70e74f718bd2cc2377debf51
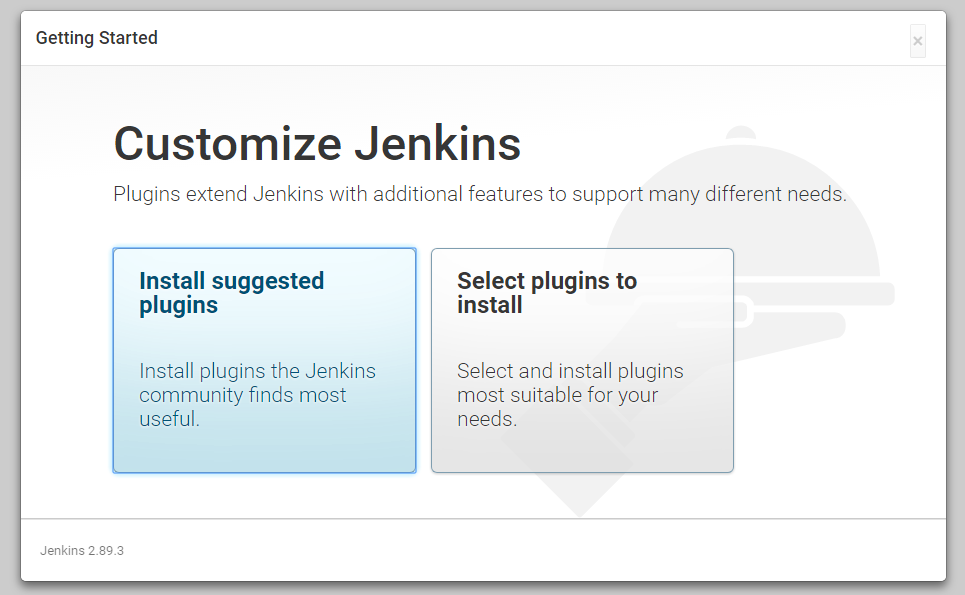
Install latest plugins
First installation, Jenkins proposes to install a series of suggested plugin. Let’s do it!
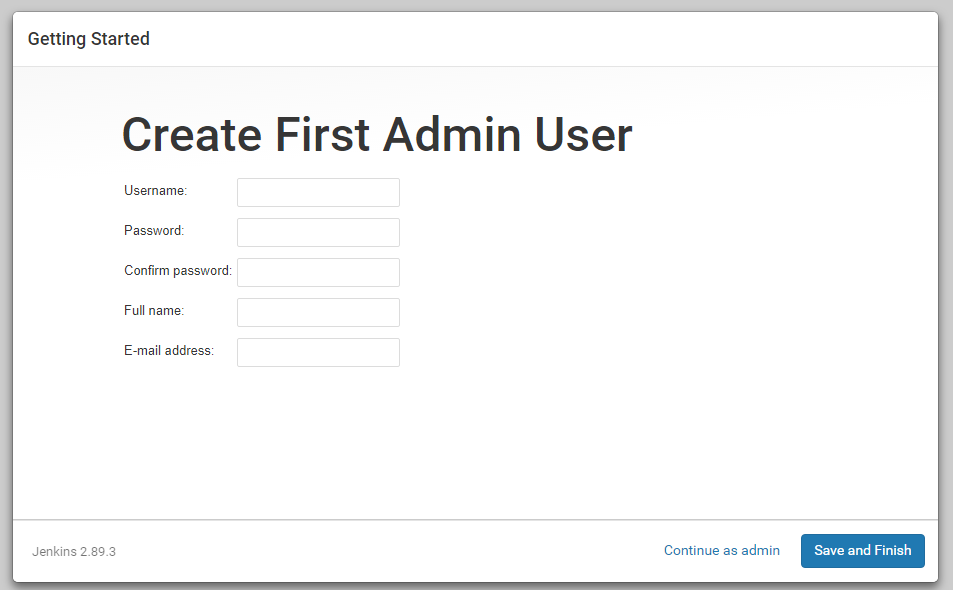
Create first user
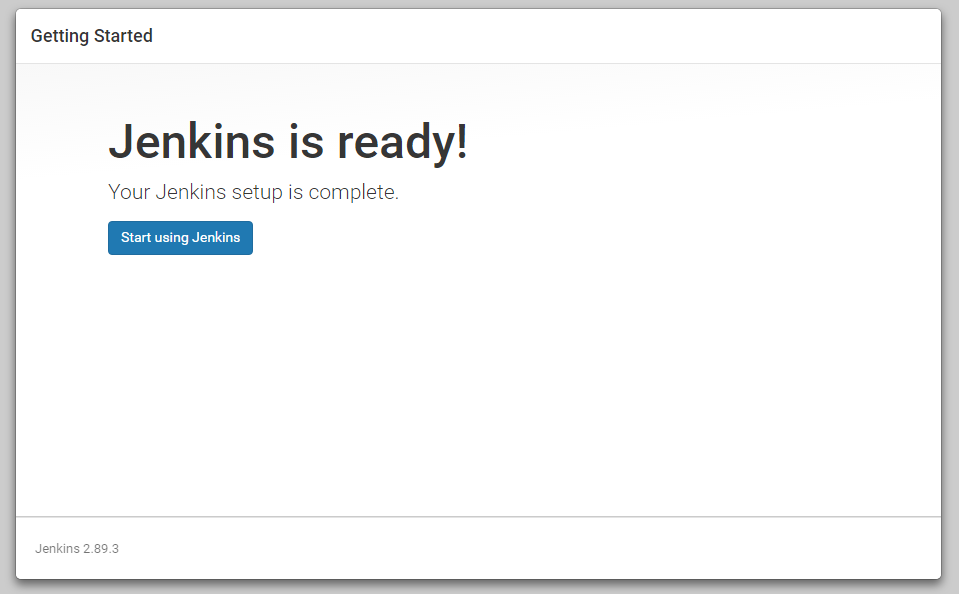
Ready to rock!
Jenkins Security configuration
To be able to checkout projet source code and deploy to AWS, Jenkins needs to access credentials. Jenkins has its own vault to store credentials.
Navigate to http://localhost:8080/credentials/store/system/domain/_/newCredentials
- Create GIT credentials to access your repository (username/password or ssh key)
- Create AWS Username/Password credentials (id: AWS) to login to your AWS account (
AWS_ACCESS_KEY_IDandAWS_SECRET_ACCESS_KEY). More details on AWS Documentation
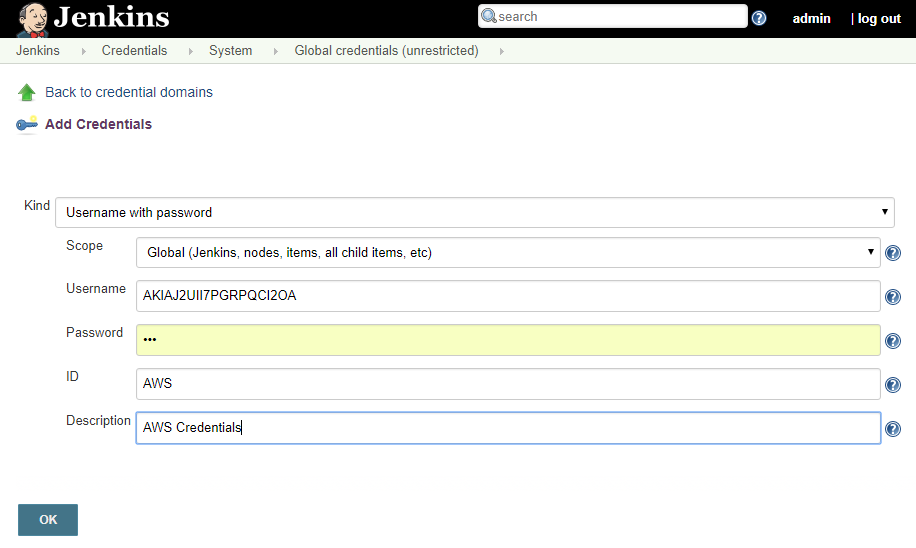
Jenkins vault has sub-level of credentials, in this article credentials are added as global credentials so all jobs can use them.
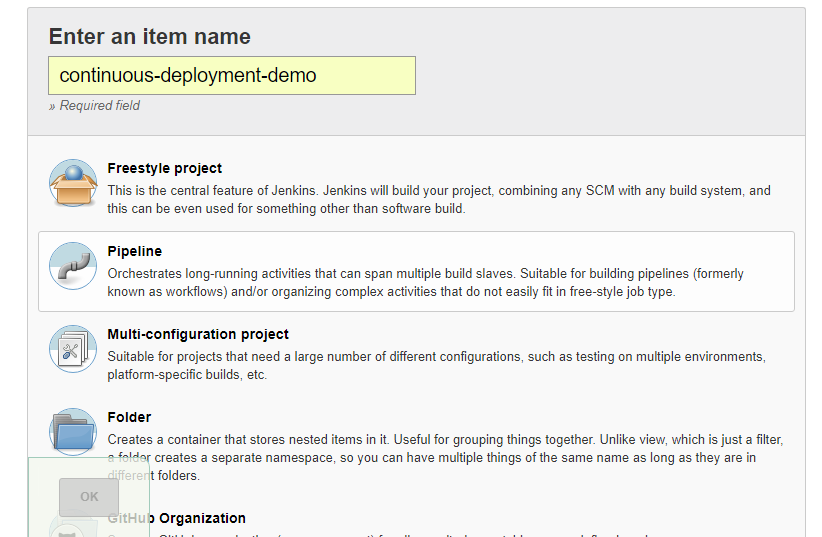
Create first Jenkins Pipeline Job
Create first pipeline job
On tab “Pipeline”:
- As Definition: Pipeline script from SCM
- SCM: GIT
- Repository URL: [your git repository]
- Credentials: [GIT Credentials]
- Let the other default parameters (branch: Master, Script path: Jenkinsfile)
- Then save it and let’s look as pipeline inside project.


Pipeline-as-code: let’s get started
In project, open Jenkinsfile and let’s take a look!
node {
  // 1. Pipeline options: check for code change in GIT' and keep only two days of history.
  properties([pipelineTriggers([pollSCM('5 * * * *')]),[$class: 'BuildDiscarderProperty', strategy: [$class: 'LogRotator', daysToKeepStr: '2', numToKeepStr: '5']]]);

  // 2. Clean workspace and checkout code from job SCM configurations
  stage("Checkout") {
    deleteDir()
    checkout scm
  }

  // 3. Let's build application within a Maven docker image
  stage("Build") {
      // Compile, Test and Package
      docker.image('maven').inside {
          sh "mvn package"
      }
  }

  // 4. Add Job Junit reporting inside Jenkins
  stage("Report tests") {
      junit allowEmptyResults: true, testResults: '**/TEST-*.xml'
  }

  // 5. Deploy to AWS using Security credentials: ACCESS_KEY and SECRET from custom IAM Jenkins user
  docker.image('chriscamicas/awscli-awsebcli').inside {
    withCredentials([[$class: 'UsernamePasswordMultiBinding', credentialsId: 'AWS', usernameVariable: 'AWS_ACCESS_KEY_ID', passwordVariable: 'AWS_SECRET_ACCESS_KEY']]) {
      // Prepare environment by creating and prepare environments
      stage('Prepare environment') {
        sh 'eb init continuous-deployment-demo -p "64bit Amazon Linux 2017.09 v2.6.4 running Java 8" --region "ca-central-1" '
        // Since AWS failed on create if environment already exists, try/catch block allow to continue deploy without failing
        try {
          sh 'eb create jenkins-env --single'
        } catch(e) {
          echo "Error while creating environment, continue..., cause: " + e
        }
        sh 'eb use jenkins-env'
        sh 'eb setenv SERVER_PORT=5000'
      }
      // Ready to deploy our new version !
      stage('Deploy') {
        sh 'eb deploy'
        sh 'eb status'
      }
    }
  }

}
To execute Pipeline, return to Jenkins and click “Build Now” in pipeline job.
The pipeline script (Jenkinsfile) is in the application, it evolves at the same time as the application and is now under version control. Each code change will trigger a new pipeline job and redeploy to AWS!
Conclusion
![]() Jenkins has a ton of plugins to orchestrate with multiple tools and platforms.
Jenkins has a ton of plugins to orchestrate with multiple tools and platforms.
![]() Jenkins has built-in credentials system, storage, configuration files. Jenkins works like a standalone system.
Jenkins has built-in credentials system, storage, configuration files. Jenkins works like a standalone system.
![]() Jenkins pipeline-as-code (Jenkinsfile) allows code sharing through shared library mechanics, convenient for common operations.
Jenkins pipeline-as-code (Jenkinsfile) allows code sharing through shared library mechanics, convenient for common operations.
![]() Jenkins-cli is not powerful as other CI-Engine so WebInterface is required in almost every case.
Jenkins-cli is not powerful as other CI-Engine so WebInterface is required in almost every case.
![]() Jenkins pipeline-as-code (Jenkinsfile) is based on Groovy engine but with specific syntax which requires a learning curve.
Jenkins pipeline-as-code (Jenkinsfile) is based on Groovy engine but with specific syntax which requires a learning curve.